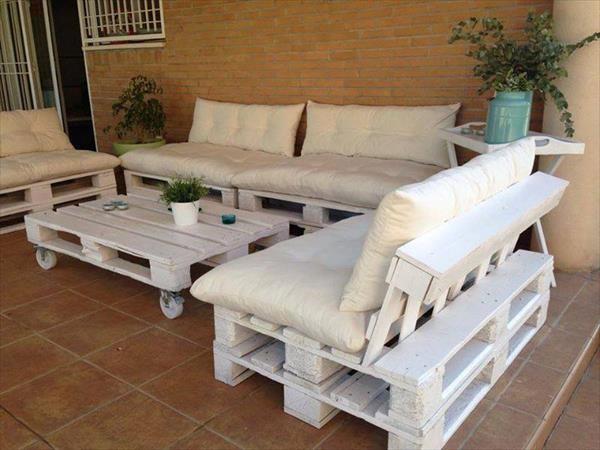
The Basics of Pallet Furniture Building
The Basics of Pallet Furniture Building
There is pallet furniture everywhere you look now. Buying it can be expensive. Building it is more fun and of cost a lot more wallet friendly BUT you have to know where to start. The basics of pallet furniture building are not too difficult.
No matter what your level of experience is you can learn to create awesome pallet furniture by using the basics, taking your time and becoming familiar with the tools and steps. The basics are the same with every design no matter how complex the design is.
Everything Starts With the Pallet
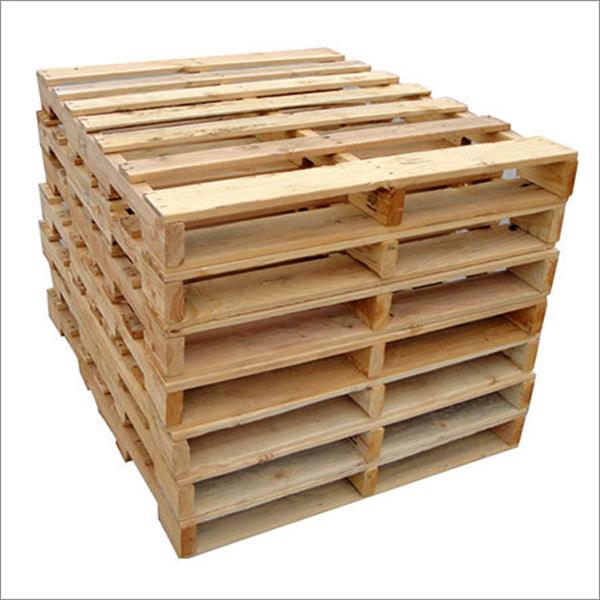
Every pallet plan starts with the pallet. Choosing the right pallet is an important first step. There are several ways you can secure a few pallets. You can buy them new. You can get some for free from several different locations (they are discussed below).
There are advantages to choosing new over used. When you purchase new pallets you do not have to worry about bends or bows in the wood. Of course you miss out on the cost savings if you buy new but you also do not have to deal with the worry of whether or not the wood is going to be in good shape.
Where can you get used (for free) pallets?
For many people creating pallet furniture is enhanced by the idea that they are building furniture for free or for almost free. So where can you search for free pallets?
- Furniture stores
- Grocery stores
- Warehouses
If you want free pallets you have to ask for them. Finding free pallets is getting increasingly difficult because they are becoming more popular. Sometimes you can find ad’s online for people that are trying to get rid of pallets.
You can check with furniture stores, grocery stores and warehouse stores. Speak with the manager at ask them if you can have a couple of their pallets when they are done with them. Leave your phone number and let them know you will wait to hear from them.
It may take a little time to get the pallets that you need for your project but you will be getting them for free.
Also keep in mind that if you are relying on free pallets you may have to make some repairs to them. Luckily you can easily repair a pallet even if you do not have any experience. If you decide to buy new you will not have to worry about any repairs.
The Benefits
Creating pallet furniture is a great way to save money and it also allows you to up-cycle something that would normally wind up in the trash. It is a great way to recycle and up-cycle materials. It is a great “green” option for anyone that is environmentally conscious.
Building pallet furniture by hand also gives you a sense of accomplishment that can be hard to get any other way. Building pallet furniture is a fun way to decorate your home, provide unique gifts for your friends and family and generally help you to express your creative side.
Being able to build something useful is a great feeling and anyone can do it.
It can also be a fun family project. You can get the whole family involved in creating the furniture.
Start Out Small
If you are new to pallet furniture building you will want to start out small. Start out with a coffee table or an end table just so you can get a feel for it. Once you have mastered the smaller items you can move on to the bigger items.
If you are confident you can jump right in and start creating larger pieces right away but if you have never worked with wood before and are a little leery about working with wood start out small to build your confidence.
The key to successfully building pallet furniture is to take your time and follow the steps. While it can look easy to construct pallet furniture there are different levels of ease and difficulty. Until you are familiar with working with the pallets you make want to take it easy on yourself and start out with something easy.
The Tools
Once you have secured the pallets you will need the right tools to make the job easier. The right tools will make any plans that you are trying to follow a lot easier to accomplish.
You can start out with the following if you do not want to invest too much money (most people will already have these items on hand):
- A hammer
- Wood glue
- Clamps
- Drill
- Screws
- Screw driver
- Measuring tape
- Something to mark the wood with
- Saw
- Sand paper
- Stain
- Sealer
If you are confident that this will be a new hobby or activity that you will stick with or if you have the extra money to invest the following tools will make the job a lot easier:
- Power drill/screw driver
- Power saw
- Power hammer
- Power sander
The power tools are not a necessity but they are nice to have around because they can speed up the process of putting things together.
The Easiest Way to Do Things
Before you get started lay out all of your materials and tools. Make sure you have your plans ready. You will need to sand the pallet but you should sand it after you make your cuts. Measure according to the plans using your tape measure.
The old saying “measure twice cut once” is very good advice. You want to measure all of your cuts twice to be sure that you are measuring accurately before you make any cuts. Once you cut the pallet to the wrong size you cannot go back and undo the cut so be sure that you are measuring exactly to the specifications. Investing in a good tape measure that is easy to use can help to ensure that you make the right cuts.
It is easiest to make all your cuts at once and then mark each piece using a marking system that you are comfortable with (most plans will signify which pieces go together by using a marking system like A,B,C or using numbers). Once you have all of your pieces cut, marked and laid out you can start sanding. You can also wait until you have the pieces put together to sand but it is a good idea to rough sand the pieces before you put them together than fine sand them once everything is together.
Sanding the pieces before you join them will ensure that you are able to get to all the parts without too much trouble. In most cases hand sanding is recommended so that you do not cut too deeply into the wood. Take your time to sand evenly. You may want to use gloves to keep your hands from getting scuffed up from the sanding (it also helps to avoid splinters).
You should expect imperfections in the pallet and incorporate it into the design. The charm of using pallets is that they are imperfect. Once the piece is finished the imperfections will really make the piece stand out. For example, knots in the wood will absorb stain more deeply and give your piece character.
The point is that you do not have to get to crazy with the sanding, you just want to make sure that there are no splinters.
Joining the Pieces
When making furniture the two most important activities is to cut the wood to the right sizes and creating a strong joint. Some basic pallet furniture instructions either tell you to use wood glue or screws. You should use both.
Start by using the wood glue and clamps to hold your joints together, you can also use Bungee cords to hold the larger joints together while the glue dries. You do not need to use a lot of glue just enough to give extra strength to the joint.
You will want to start your screw holes by using a drill bit that is just a tad smaller than the screw width. You can use a piece of electrical tape to mark where you want to drill, the tape offers the added benefit from keeping the wood from splitting when you drill into it.
Once you have all your holes drilled you can start screwing everything together! After it is all screwed together you can go over the furniture with fine sand paper to get a nice smooth finish. Once you have it all sanded you can add some stain or you can simply seal it.
Creating pallet furniture for your home is a great way to add some custom touches. You never know you may be embarking on a new business if you get good enough at it and find the process enjoyable. Most people report that they do really enjoy the process and enjoy being able to be proud of the furniture that they create.
Just think, by using these simple basic instructions you can apply them to any design and start creating furniture that you can actually sell.
Pallets Ideas Submitted by: Mark Bank

